 English
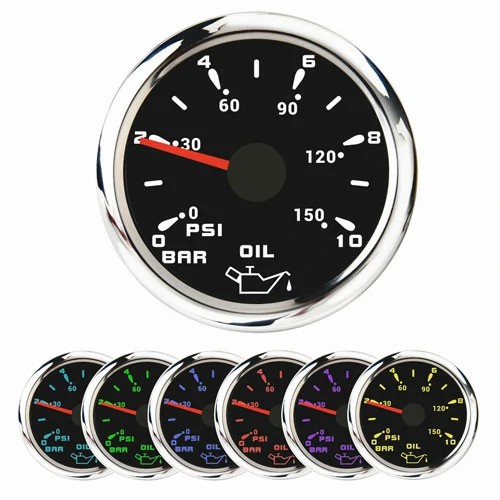
 harley davidson oil pressure gauge installation
First of all, it should be reminded that it is locked with the VIN (frame number) in the ECM, just like the new instrument of recent models. Before installation, the mileage data of the original vehicle should be imported into the new meter, otherwise the word "NO CAL" will be displayed. Copying data is relatively simple. A short plug cable is attached with the meter, one end is connected to the meter, and the other end is connected to the diagnostic plug on the left cover of the vehicle. Turn on the ignition switch, and the meter will display the copying progress, followed by the word "CHECK", Turn off the ignition switch and unplug the plug after the word "OK" is written. You can install a new instrument. Remember to set the direction of the meter and then tighten the screws. The mileage record of locked VIN at 50km mentioned above is in small mileage B. Press the "Trip" button briefly to switch to the meter display to see the countdown mileage. When it reaches zero, it will be locked to the current vehicle.
1. First, unplug the harness plug of the Harley oil pressure sensor and remove the oil pressure sensor.
2. Next, screw the hose connector of the oil pressure gauge into the bolt hole of the oil sensor of the device, tighten the connector, and place the oil pressure gauge where it will not contact the rotating parts and high-temperature parts of the engine.
3. Finally, start the engine, make the engine reach the normal working temperature, and compare with the specification value to complete the measurement. First remove the line clutch faucet, and then remove the line clutch from the two clips on the frame. The clips are very easy to remove. Start to remove the big pot cover on the clutch. After unscrewing the six screws on the cover, the pot cover will come down. Remove the clip at the end of the clutch line. Note: First remove the clutch hook, and then remove the clip at the end of the line clutch, so that the line clutch can be completely removed, When screwing the screws at the end of the clutch, pay attention to that the thread should be turned as a whole, otherwise the thread is stiff and cannot be unscrewed. The oil pressure clutch kit is divided into two parts, the upper pump (the tap part we have long said) and the lower pump (the part installed on the gearbox). The upper pump and the lower pump are connected by oil pipes. Install the lower pump onto the gearbox, install and tighten the screws of the lower pump, connect the clutch hook with the metal rod of the lower pump, and then install the clutch hook back to the original position of the gearbox. After the distance between the lower pump and the clutch hook is adjusted, the gearbox pot cover can be installed. Remember to screw on all six screws (do not tighten them) before screwing on the pot cover screws, and then tighten each screw diagonally. Finally, add clutch oil.

Get a Quote / Info