 English
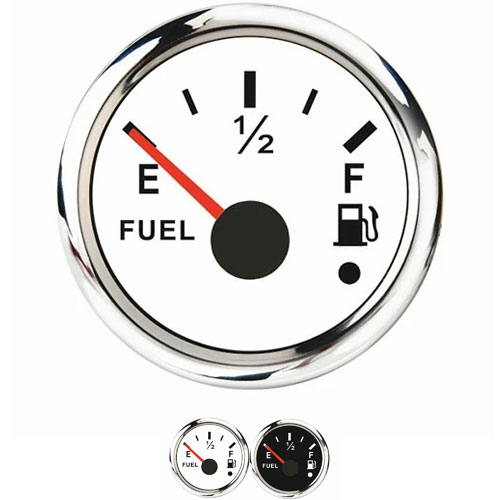
 fuel level gauge reading incorrectly
Reason: The sensor of the resistor-coil fuel gauge is a slide wire with a float. The rheostat is on the top surface of the fuel tank. When the oil level changes, the float will drive the sliding contact arm of the sliding wire rheostat to rotate an angle. As a result, the position of the contact on the resistance coil changes accordingly, and the resistance value connected in series on the fuel gauge changes directly, causing the current in the gauge to change and the gauge needle to deflect. Common failures of resistance-coil fuel gauges are: The indication value is not accurate, the pointer is issued and the pointer swings irregularly, etc. The main reasons for inaccurate indications are:
The float arm is bent, the insulation layer of the wire is damaged, the coil fixing screw in the meter is loose and the coil is displaced, etc. The float arm should be straightened, damaged link wires replaced, and the fuel gauge readjusted. The pointer is stuck due to poor contact of the wire, not the contact between the hands and the dial. Check each terminal and sensor resistance coil for loose joints and broken wires.
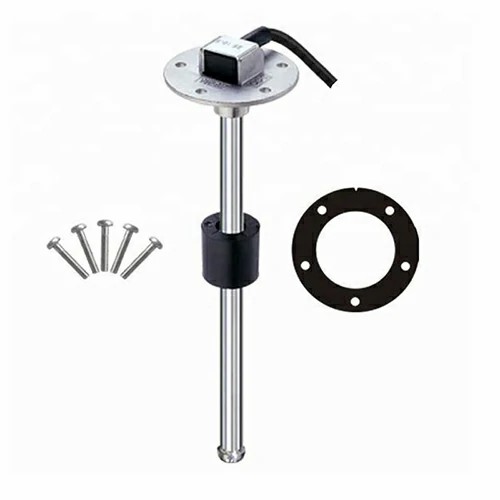
The cause of the irregular swing of the pointer is that the resistance coil of the sensor is loose and in series, and the contacts are deformed and lose the elastic force to press the resistance coil. The sensor can be removed for inspection and repair. If the resistance coil is broken or its parts are damaged, the sensor should be replaced. For the out-of-adjustment fuel gauge, it can be adjusted as follows: Take a new sensor, connect it with the fuel gauge and connect it to the power supply. Fix the watch on a vertical wooden board and straighten it. Fix the sensor housing on a horizontal wooden on the board, lift the float arm to the highest position of the corresponding glaze surface, record the number indicated by the pointer, then lower the float arm to the lowest position of the corresponding oil surface, and record the position of the pointer. Then, place the float in the middle and note the pointer position. Finally adjust as follows: If the indication is too large, that is, when the float is in the middle position and the number indicated by the pointer is greater than 1/2, the case can be removed, and the fastening screw of the coil (left coil) connected in series with the sensor resistance coil can be loosened, and the The coil moves down, bringing it closer to the armature. Test after tightening the screw until the pointer is aligned with 1/2 of the indication.
If the indicated number is too small, the method is opposite to what was said before, and the series coil is moved up, and the principle pointer armature is used.When the float is at the highest position and the indicator of the pointer is less than 1 (or F), the screw of the coupling coil should be rotated to loosen it, and the coil should be moved down, close to the armature, until the pointer is aligned with 1 (or F). hour. On the contrary, if the indication number of the pointer is greater than 1 (or F), the parallel coil should be moved up.When the float is at the lowest oil level and the pointer of the watch does not point to 0, it means that the fixed position of the dial is not accurate. The screws fixing the dial should be loosened, and the pointer should be aligned with the zero scale line, and then the screws should be fixed again.


Get a Quote / Info